|
|
|
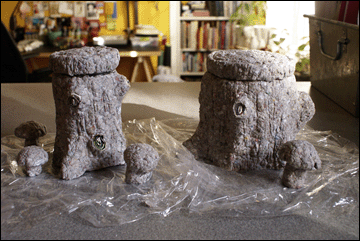
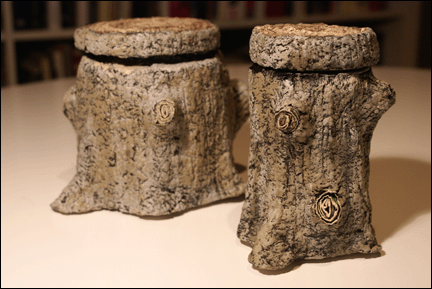
Project: Papier-mâché Faux Bois Containers
(watch me demonstrate this project on Martha Stewart!)
|
|
Sometimes I become obsessed with a craft project for unhealthy reasons. I attempted this project once before and the results were embarrassing. Instead of dismissing it as a total failure and moving on with my life, I tried it again. I think it was a project worth persuing because it has all the things I love- most of the materials are free (nearly everything I used came from our recycling bin) and it is an extremely flexible medium- you can make just about anything out of papier-mâché dough once you get it to the right consistency.
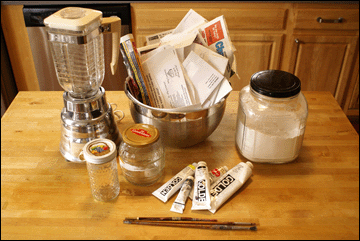
What you'll need:
- paper- I used old envelopes and junk mail
- glass jars (I used an old canning jar and a sauerkraut jar)
- flour and salt
- a blender
- masking tape
- acrylic paint/brushes
|
Step 1: Tear the paper into small pieces, as small as you can without losing your mind. I shredded mine even further by whizzing it around in the blender, a handful at a time, and ended up with two big bowls of shredded paper.
Step 2: Cover and soak the paper in warm water overnight. You can also boil the paper/water mixture in less time if you want to speed things up a bit.
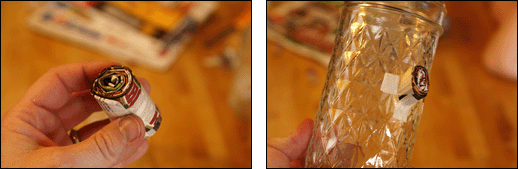
Step 3: To make the cut-off branches on the trunk, cut long strips of paper, twice as wide as you want your branch to be long, fold the paper in half, length-wise, roll it up tightly and tape it. Cut one end at an angle and tape that end to the glass jar so that the branch is angled upward.
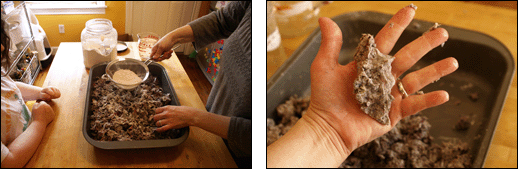
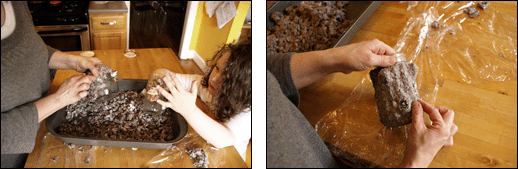
Step 4: Squeeze some of the water out of your paper pulp and spread it out into a pan. Sift a layer of flour over the mixture (and add a little salt too to keep the mold from growing on it) and knead. Add more water and add more flour (lightly sift it on). Knead. Repeat. A lot. Don't lose patience and try to use the stuff before it reaches its peak mushiness- IT WON'T WORK. This is one area where I failed the first time I tried this project. If you keep adding the flour and water and kneed the heck out of it, eventually this beautiful stuff emerges and when you squeeze it, it'll look/act like clay and then you know it's ready.
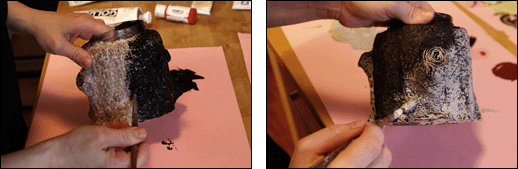
Step 5: Start clumping your papier-mâché onto the jar, starting at the bottom and working your way up to the top of the jar. Stop just below the threaded lip of the jar. When you have it covered, you can start working on the finer details of your faux bark.
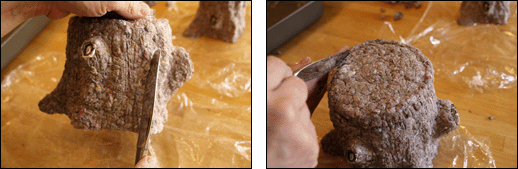
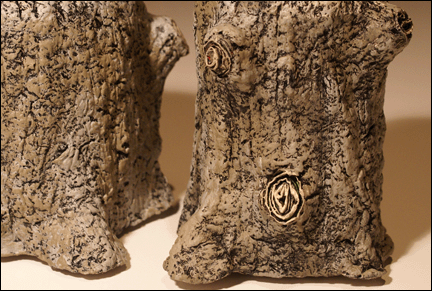
Step 6: I flared out the papier-mâché at the base to make the upper parts of the roots and used a knife to add texture. At this point I could have left the stumps as is, but I wanted to see if I could successfully make a lid that looked like the top of the stump. I used the knife again to shape the papier-mâché to look like the rings of the tree stump.
Step 7: I let them dry in a warm place. It took several days for them to dry since some areas were pretty thick. Oh, and Eleanor made some mushrooms too out of the leftover papier-mâché dough.
Step 8: The first go round of these I slapped on some brown paint and called it a day. I ended up with what looked like tree-shaped poop- not very nice at all. This time I paid more attention to the real thing and started with black paint, and filled in all the cracks. After that dried, I lightly brushed a layer of gray/brown over the top, making sure to leave the black details showing.
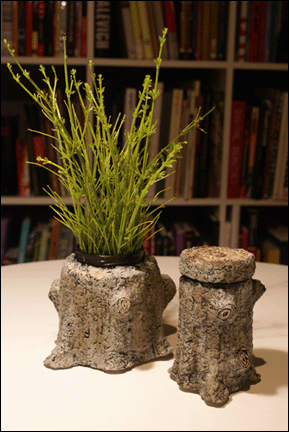
They're weird little things. I think I like them. I could see myself making a whole forest of these in different sizes and maybe some papier-mâché forest critters to go with them.
|
|
Poopscape is written by Claire Chauvin, a craft-obsessed mother and photography teacher living in Houston, Texas. If you have a question or a compliment, have tried one of my projects and want to share with me, or just want to chat, please email me at claireATpoopscape.com.
|