|
|
|
Projects: Terrorium and Conjoined Twin Specimen Jar for a Halloween Wunderkammer
|
|
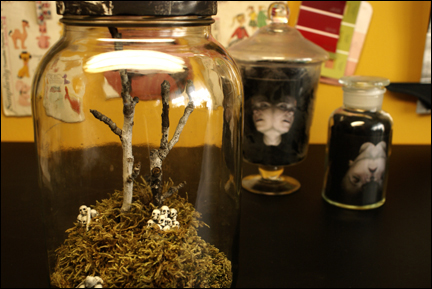
I've been obsessed with the idea of the wunderkammer since way back in grad school and I can't shake my obsession with putting things in jars, living or non-living, so I decided to create a duo of jar projects- a perfect addition to any Halloween wunderkammer. I'm nuts about Halloween, but if you're not so into it, you could certainly modify one or both of these projects to suit any holiday. Just think how cute an encapsulated Santa or a couple of conjoined reindeer would be? Bwah-ha-ha!
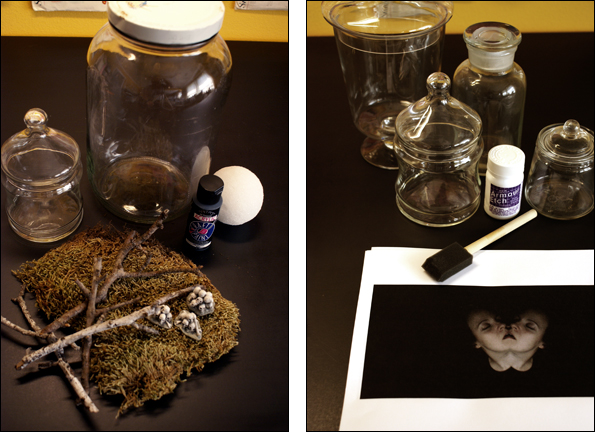
What you'll need for the Terrorium:
- glass jar
- dried moss
- itty bitty skulls
- twigs or small branches
- styrofoam ball
- scissors & glue
- black acrylic paint
|
What you'll need for the Conjoined Twin Specimen Jar:
- glass jar, preferably with straight sides
- glass etching cream
- foam brush
- Mac with Photo Booth (or Photoshop)
- printer & printer paper
- black felt
- scissors/x-acto knife
|
Project 1- Terrorium
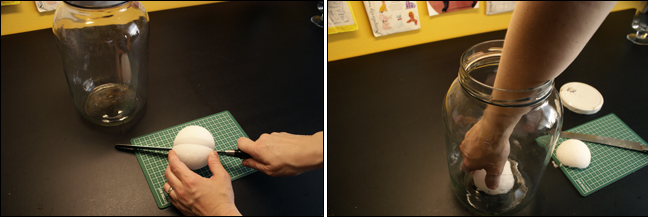
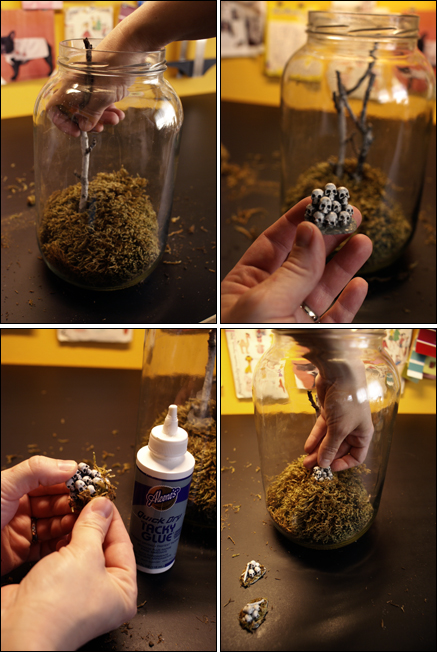
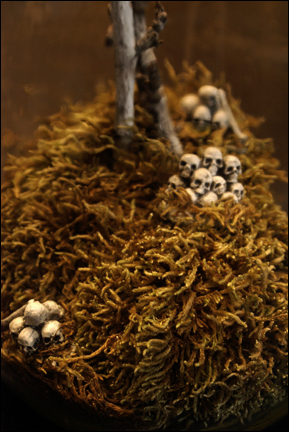
Step 1: I cut a styrofoam ball in half and placed one half in the bottom of the jar to form the support of the moss mound. I used a giant pickle jar that I'd been saving for such an occasion, but if you want to go a little fancier, most craft stores carry a good selection of apothecary jars and sometimes you can find decent ones in thrift stores.
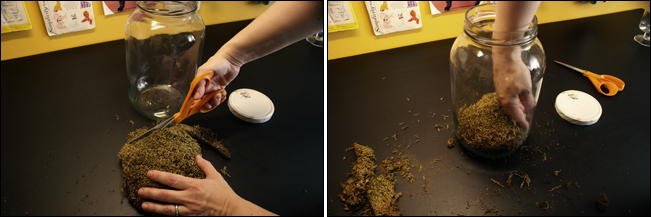
Step 2: I trimmed the moss so that it fit in the bottom of the jar and pushed into place. Don't be too quick about cleaning up the mess left by cutting the moss- it comes in handy later.
|
Step 3: I inserted the twigs through the moss and into the styrofoam. The tiny skulls came from a model kit, but it's pretty easy to find small skulls in any Halloween supply store, craft store, or Target. You could also try making them out of polymer clay. I added a bead of glue around the base and glued some of the small remaining pieces of moss to it so that once the skulls were nestled in the moss, they'd blend in a little better, a bit like a morbid easter egg hunt.
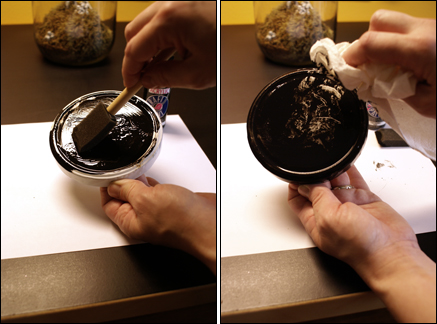
Step 4: The lid of the jar I was using still needed to be dealt with, so I painted a thick layer of black acrylic paint on it and sponged some of it off using a paper towel to give it some visual interest. Instead of watching paint dry, why don't we start working on our other jar project?
Project 2- Conjoined Twin Specimen Jar
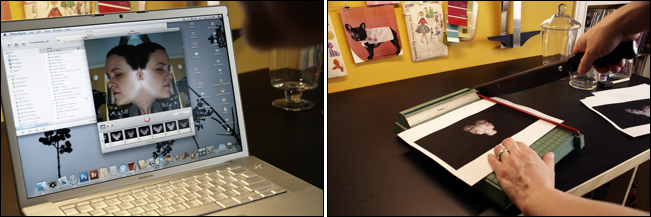
Step 1: I used the mirror effect in Photo Booth, but you can use Photoshop to do a similar effect pretty easily. Experiment with the lighting and background until you get the effect you want. If the idea of making conjoined twins icks you out too much, you can always use another appropriate image. Measure the height of your jar and resize your image to the same height. Print it out and trim off the white area.
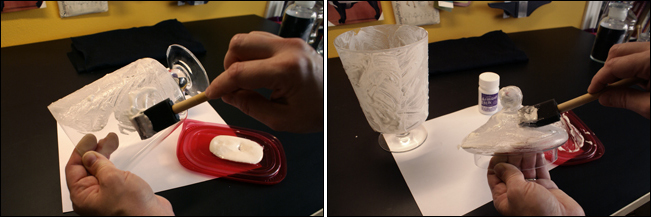
Step 2: I used glass etching cream to make my specimen jar look old. I coated the glass liberally in the cream, and applied it in irregular patches so that the frosted effect looked more blotchy than streaky. A word of warning about glass etching cream- unless you're really good about not getting the stuff on your hands, wear latex gloves. It's murder on your skin! Also, if you're planning on using Pyrex glass, don't bother using the glass etching cream on it. It resists acid and will not etch (I tried it! See below.) Rinse off the cream and dry the jar.
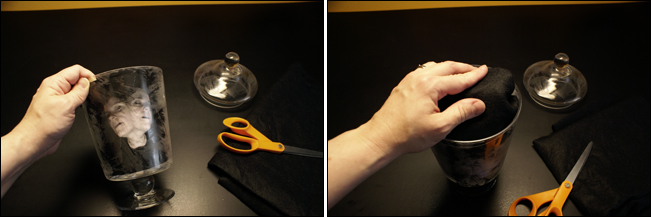
Step 3: I added my image to the inside of the glass so that it's facing outwards. I inserted a wad of black felt to help fill in some areas with more inky blackness, as well as support the print and keep it from curling up.
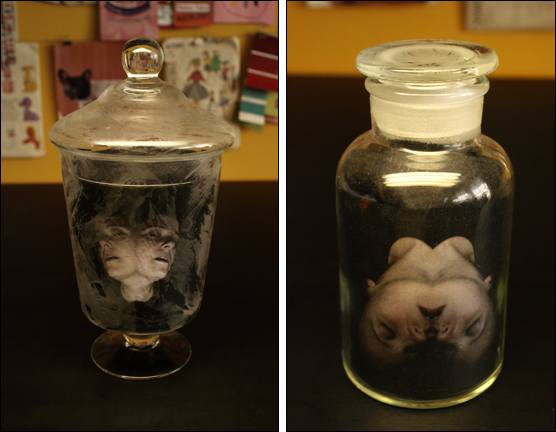
As with real wunderkammern, the more speciments you have, the better. Almost anything looks more interesting when it's in a jar.
|
|
Poopscape is written by Claire Chauvin, a craft-obsessed mother and photography teacher living in Houston, Texas. If you have a question or a compliment, have tried one of my projects and want to share with me, or just want to chat, please email me at claireATpoopscape.com.
|